

We have completely redesigned our customer portal for you. If the steps described in the guide differ from what you see, you will find a PDF version of the old guide at the end of this article.
Configuring CLIP no screening correctly
This article is divided into the following sections:
Please also take a look at the notes on the use of CLIP no screening and corresponding restrictions following this article!
In addition, you will find possible areas of application on our website.
SIP Trunks
There are several ways to set up CLIP no screening for SIP trunks. In the following we will go into it in detail.
Attention: Make sure that your used device always transmits the NPN (Network Provided Number / your SIP username) in the From-User field! This field cannot be used for CLIP no screening.
1. Open the phone settings
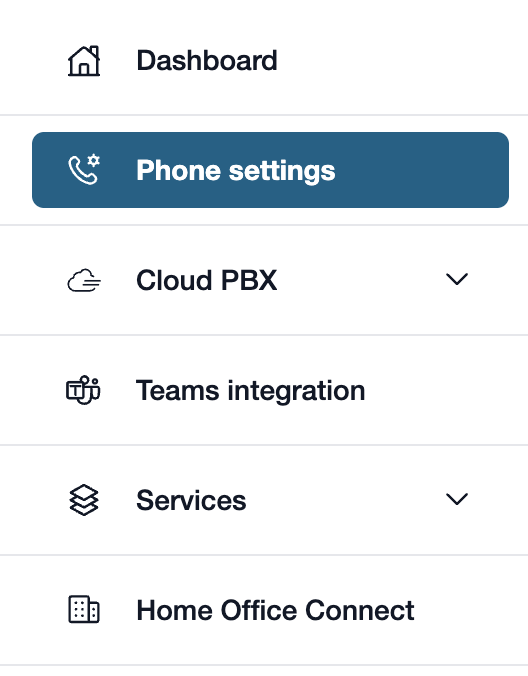
First, please go to my.easybell.
There, please click on “Phone Settings” in the left-hand menu bar.
Alternatively, you can also click on “Manage Phone Numbers” directly in the my.easybell dashboard.
2. View details
Do you have a private customer plan? If so, please click on “Private”!
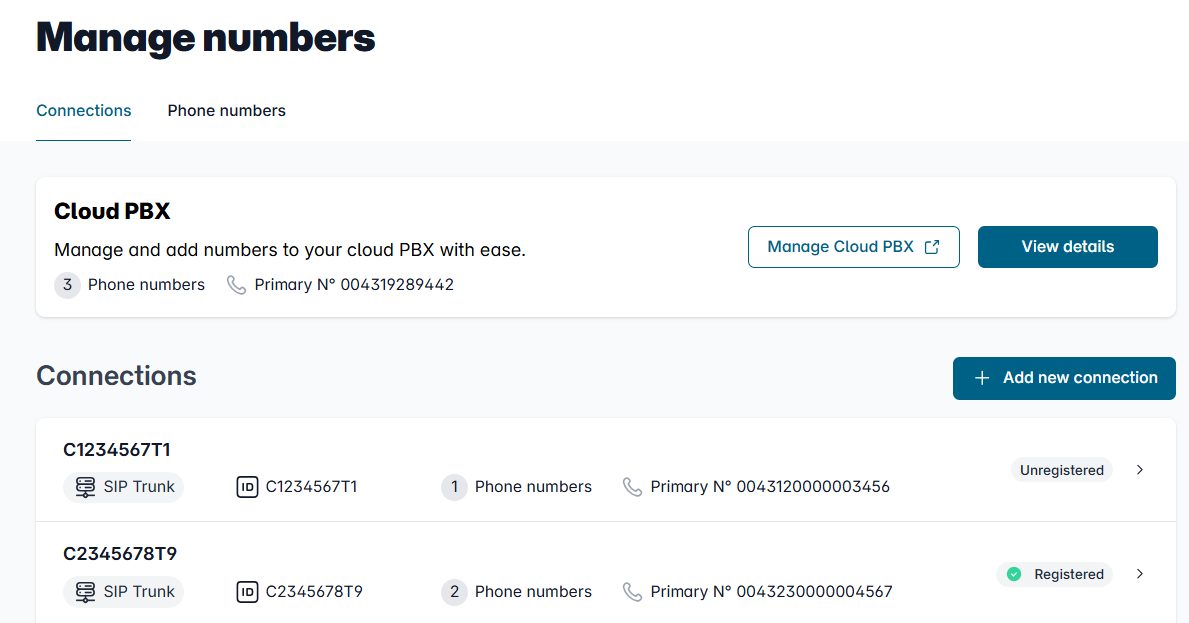
The phone settings for businesses are divided into two tabs: Connections and Phone Numbers.
In the Connection Overview, please click on the connection whose details you wish to view.
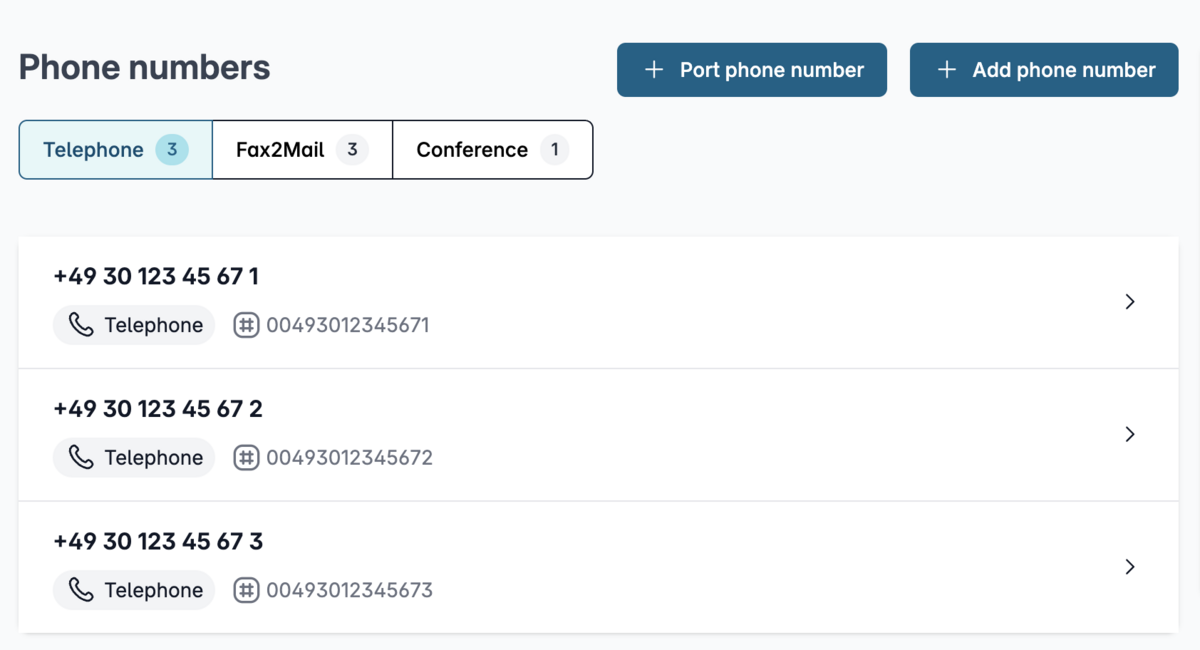
You will see an overview of your telephone numbers.
Please click on the one whose details you wish to view.
3. Open the configuration

In the details view, you will see an overview of the settings.
Please scroll to the "Configuration" section and click the "Change" button to the right of it.
4. Adjust the number display
In the mask that appears, you can now choose between "Device-dependent caller-id", "Display a specific Caller ID" and "Call anonymous".
Device-dependent caller-id (CLIP no screening)
With the device-dependent call number display, your telephone system sends the information that should be signaled in outgoing calls. Our infrastructure first checks whether the sent data is allowed, and then simply forwards it on. The prerequisite is that you have informed us in your customer portal in which field of the SIP package this information is transmitted.
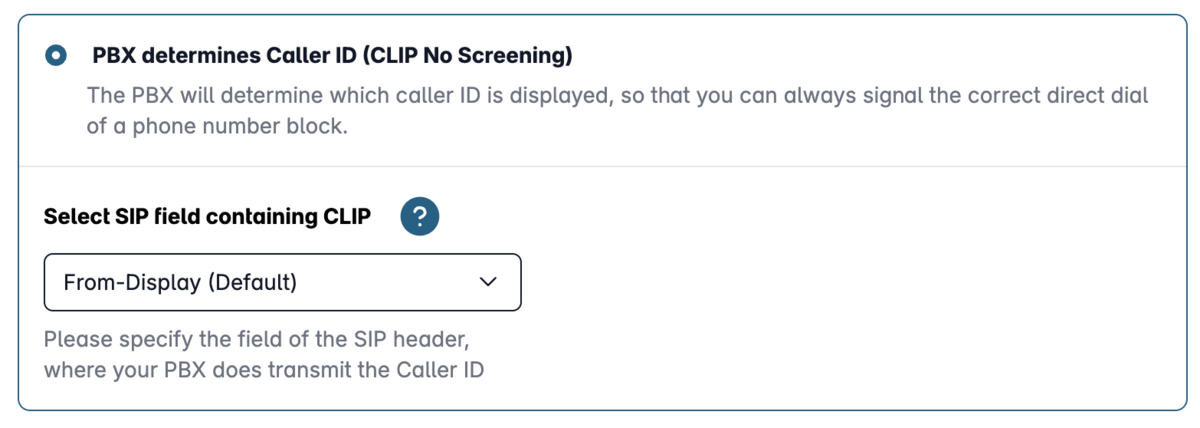
Number transfer in the field:
Here you can manually select from which field of the SIP packet the number to be sent should be transmitted. Please make sure that the telephone system actually transmits the corresponding information in this field.
Assistant for CLIP no screening:
If you are unsure which settings are correct for your system, then please use our assistant for CLIP no screening. Here you can choose from a list of telephone systems. The default setting for this model will then be set automatically.
You will also find the correct settings for the Teams Connector in this list.
Attention!For regulatory reasons, it is only possible to signal German local and mobile phone numbers as well as free German special phone numbers with the Device-dependent caller-id. You can find more information about this in our article "Which phone numbers can I display starting from?“.
Show custom phone number
In the "Display a specific Caller ID " you have the choice between the trunk's head number or a freely selectable telephone number, which can be entered in the "Area code" and "Telephone number" fields.
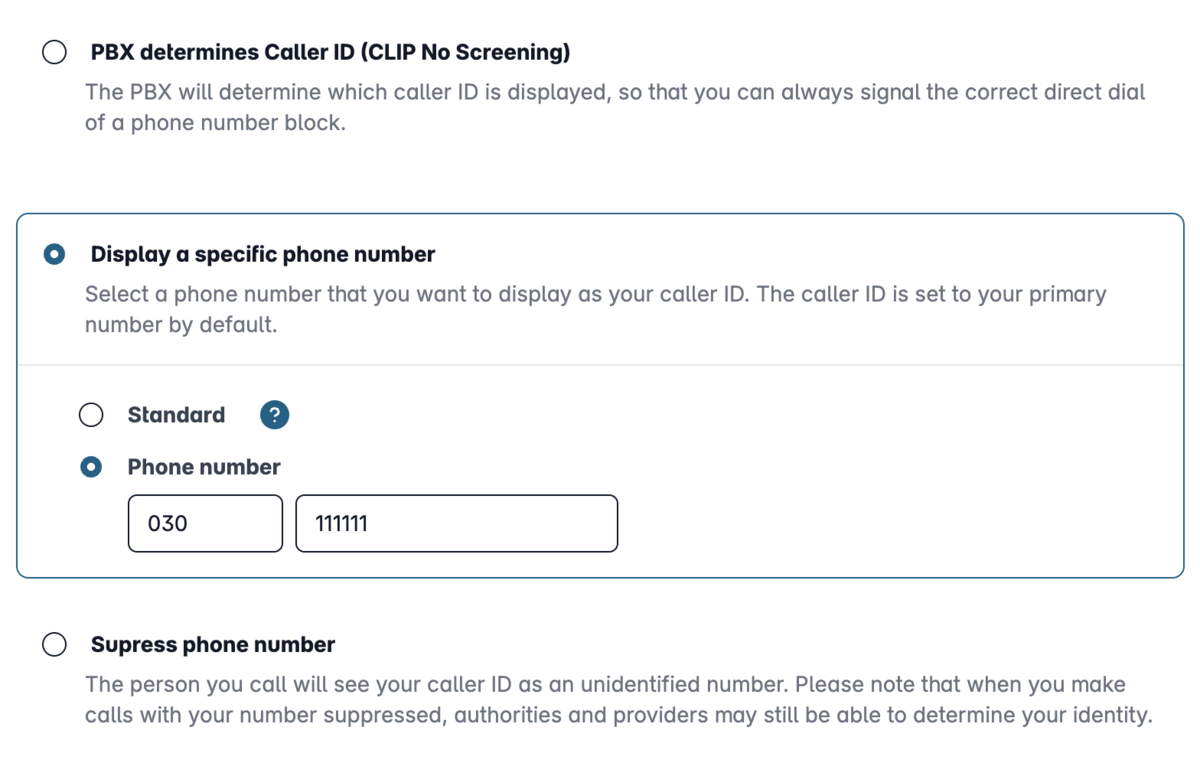
Call anonymous
Here you can set up your connection so that calls are anonymized. No outgoing call number is then signaled.
5. Apply settings
Finally, please click on "Apply" to apply the settings.
If necessary, you must confirm in advance that you have read and accept the legal notices.
Cloud Telefonanlage
1. Cloud Telefonanlage öffnen
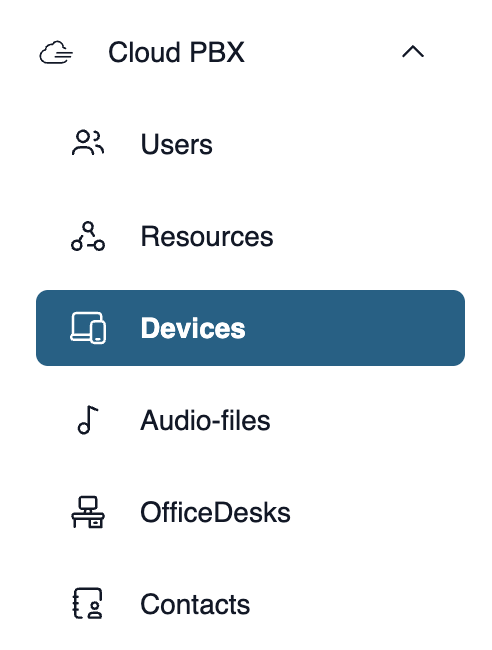

Log in to my.easybell.
In the page navigation, click on the "Cloud PBX" menu item and then on "Devices".
2. Add device
Open the configuration for an extension or create a new extension, as described in our article “Creating extensions in the Cloud PBX”.
3. Configure device
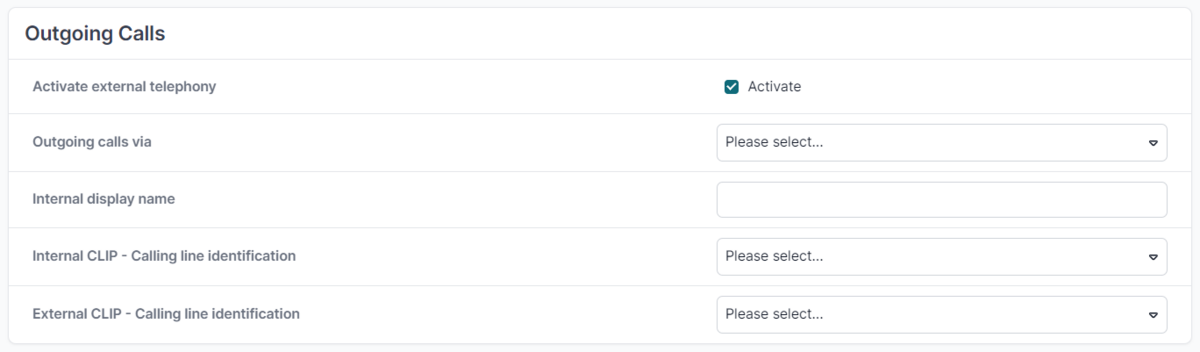
In the “Outgoing ” tab, you will find the “External calling line identification” field, where you can choose between three options:
Extension number: If the handset is already assigned to an extension, the number of that extension account is displayed here.
Number withheld: With this option, the terminal makes calls ‘anonymously’. No phone number is transmitted to the other party.
Custom number: When you select this option, additional input fields appear where you can enter a freely selectable area code and phone number.
4. Save settings
Click 'Save' to apply the settings to the device.
Teams Connector
If you use the easybell Teams Connector to link a SIP trunk to Microsoft Teams, you must also configure the caller ID display. Otherwise, outgoing calls will display only the trunk’s main number, not the extensions. The procedure is the same as for other phone systems:
- Go to my.easybell and navigate to “Phone Settings” → “Connections” Expand the connection you use with the Teams Connector and click “Change” next to “Configuration.” Look for the “Caller ID (CLIP)” section.
- Select “Device-dependent caller ID (CLIP no screening)” and open the menu with the default settings for phone systems.
- From the list, select the “Teams Connector” entry.
- Finally, save the changes by clicking “Apply.”
Notes
- You may only transmit telephone numbers to which you have a right of use.
- Phone numbers that are prohibited by the Federal Network Agency or the Austrian regulatory authority are blocked. These include, for example, special numbers, value-added service and emergency numbers.
More about this in our article "Which phone numbers can be displayed for outbound calls (CLIP no screening)? “. - Your own easybell phone number will be displayed on higher-end devices as additional information. As a result, they remain clearly identifiable, for example, for the police, call centers and emergency services.